Webhook Documentation
On this page the steps to setup a webhook with myDSV is explained.
A webhook is a reverse API, that proactively sends notifications to the provided endpoint. The myDSV Webhook will not send any sensitive data. To get the actual shipment data the Tracking API needs to be used.

Setting up a webhook
The webhooks can be created in myDSV with the following steps:
1. Request DSV to enable webhook feature via developer.support@dsv.com
2. Login using your API credentials at https://mydsv.com/new/settings/subscriptions
3. After login you will see the below screen:
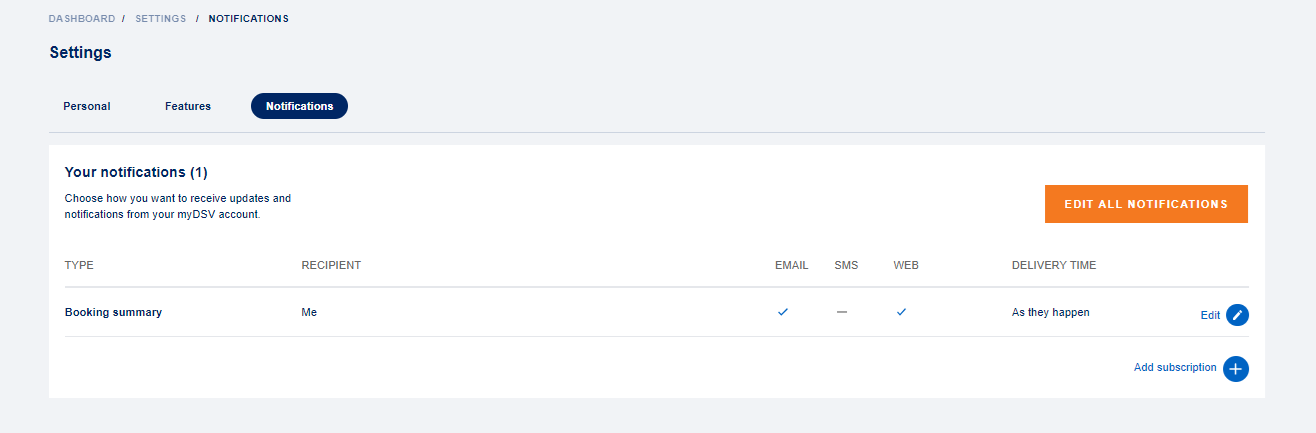
4. Click “edit all notifications” or click on “add subscription”.
5. Select the subscription you want to receive notifications for via the webhook by toggling the on / off button and click edit notification.
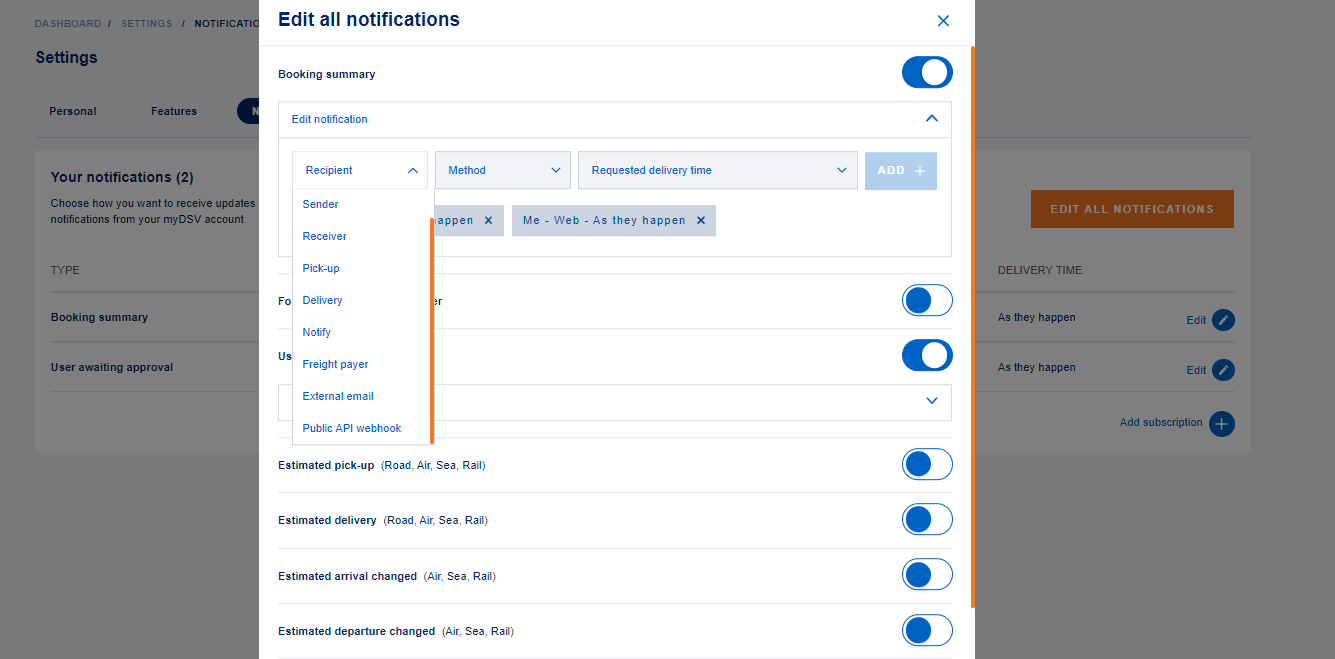
6. Select “Public API Webhook” within Recipient field
a. This option is only available if granted by developer.support@dsv.com
7. Add your endpoint in the field next to “Public API Webhook” and click add
a. myDSV will validate that your provided endpoint is a valid URL.
8. The endpoint is now configured for the given notification.
9. Click Save at the bottom of the window.
Webhook notifications are always sent as the event happens.
It is also possible to setup the Webhook on a shipment level.
This is done with the following steps:
1. Login at myDSV with your API credentials.
2. Open the shipment you want to add Webhook to
3. Click on the bell (see below)
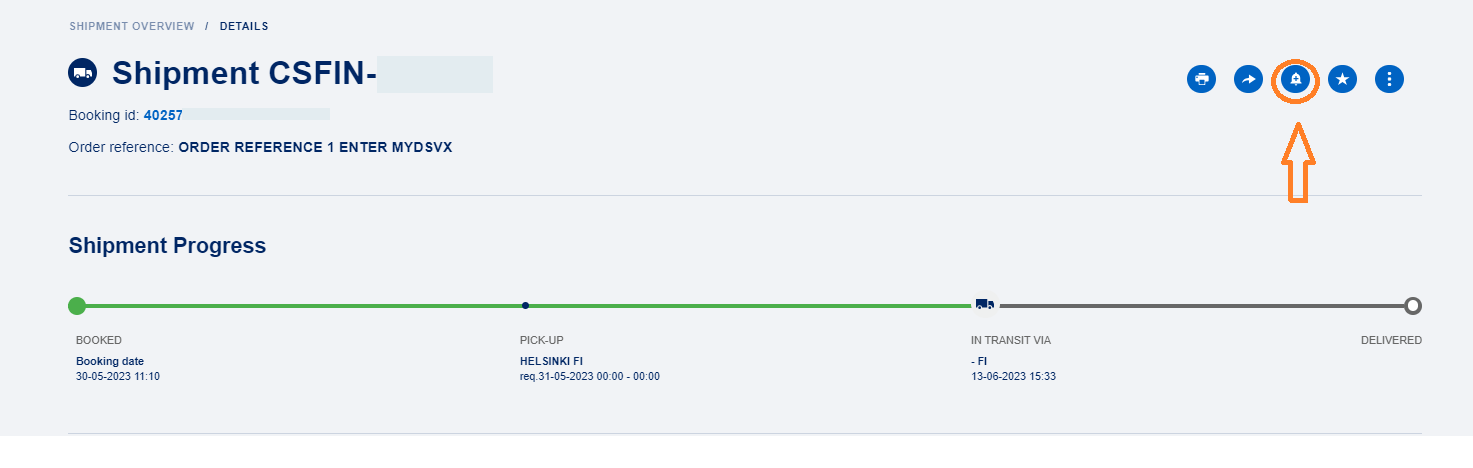
4. Select the subscription you want to receive notifications for via the webhook by toggling the on / off button and click “edit notification”
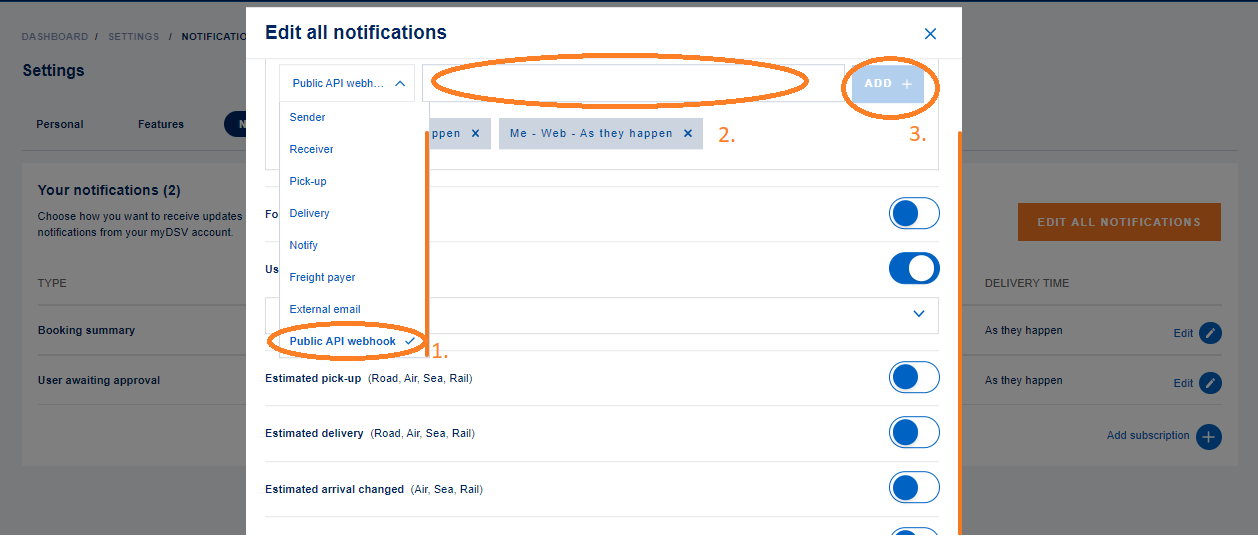
5. Select “Public API Webhook” within Recipient field
a. This option is only available if granted by developer.support@dsv.com
6. Add your endpoint in the field next to “Public API Webhook” and click add
a. myDSV will validate that your provided endpoint is a valid URL.
7. The endpoint is now configured for the given notification.
8. Click Save at the bottom of the window.
Webhook notifications are always sent as the event happens
Notification subscription options
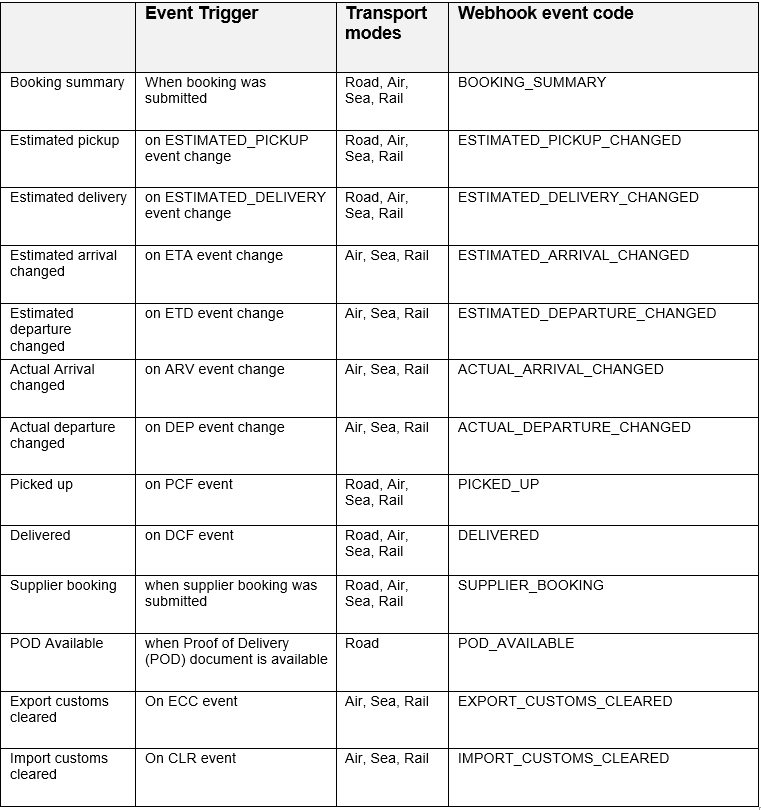
Explanation on how events are triggered.
For “estimated” notifications:
For Air/Sea/Rail we’re sending notifications when estimated date was changed. It means – there was already some date set and then it was changed
For Road we’re sending notifications even when particular date was set for the first time
Setting up the endpoint
The client setting up the endpoint is free to define how the URL should look according to own requirements. You can accept all the webhooks at one endpoint or setup multiple endpoint (one for each event)
We recommend the following:
Only send data over HTTPS
Add a security token to the URL to verify that only requests coming from DSV is allowed
Whitelist the DSV IP-address the request will be sent from
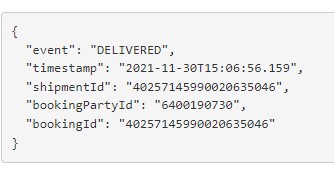
Payload structure
Payload structure of webhook:
Event (See event codes with notification subscription options section)
Timestamp (of when the webhook was triggered)
Shipment id
Booking id
Bookingparty id
Example:
Response
DSV expects to receive an HTTP 200 response code from your endpoint.